SAP UI5 Integration Cards: something I didn’t expect to enjoy 😄
Let me start with a confession: I’m not a UI person.
I’ve always felt more comfortable working on logic, backend, integrations… everything that happens “behind the scenes”. But recently I had to play a bit with UI5 Integration Cards, and honestly… I was quite surprised.
🤔 What are Integration Cards?
UI5 Integration Cards are reusable UI components designed to display content in a compact and structured way. Think of them as mini-applications.
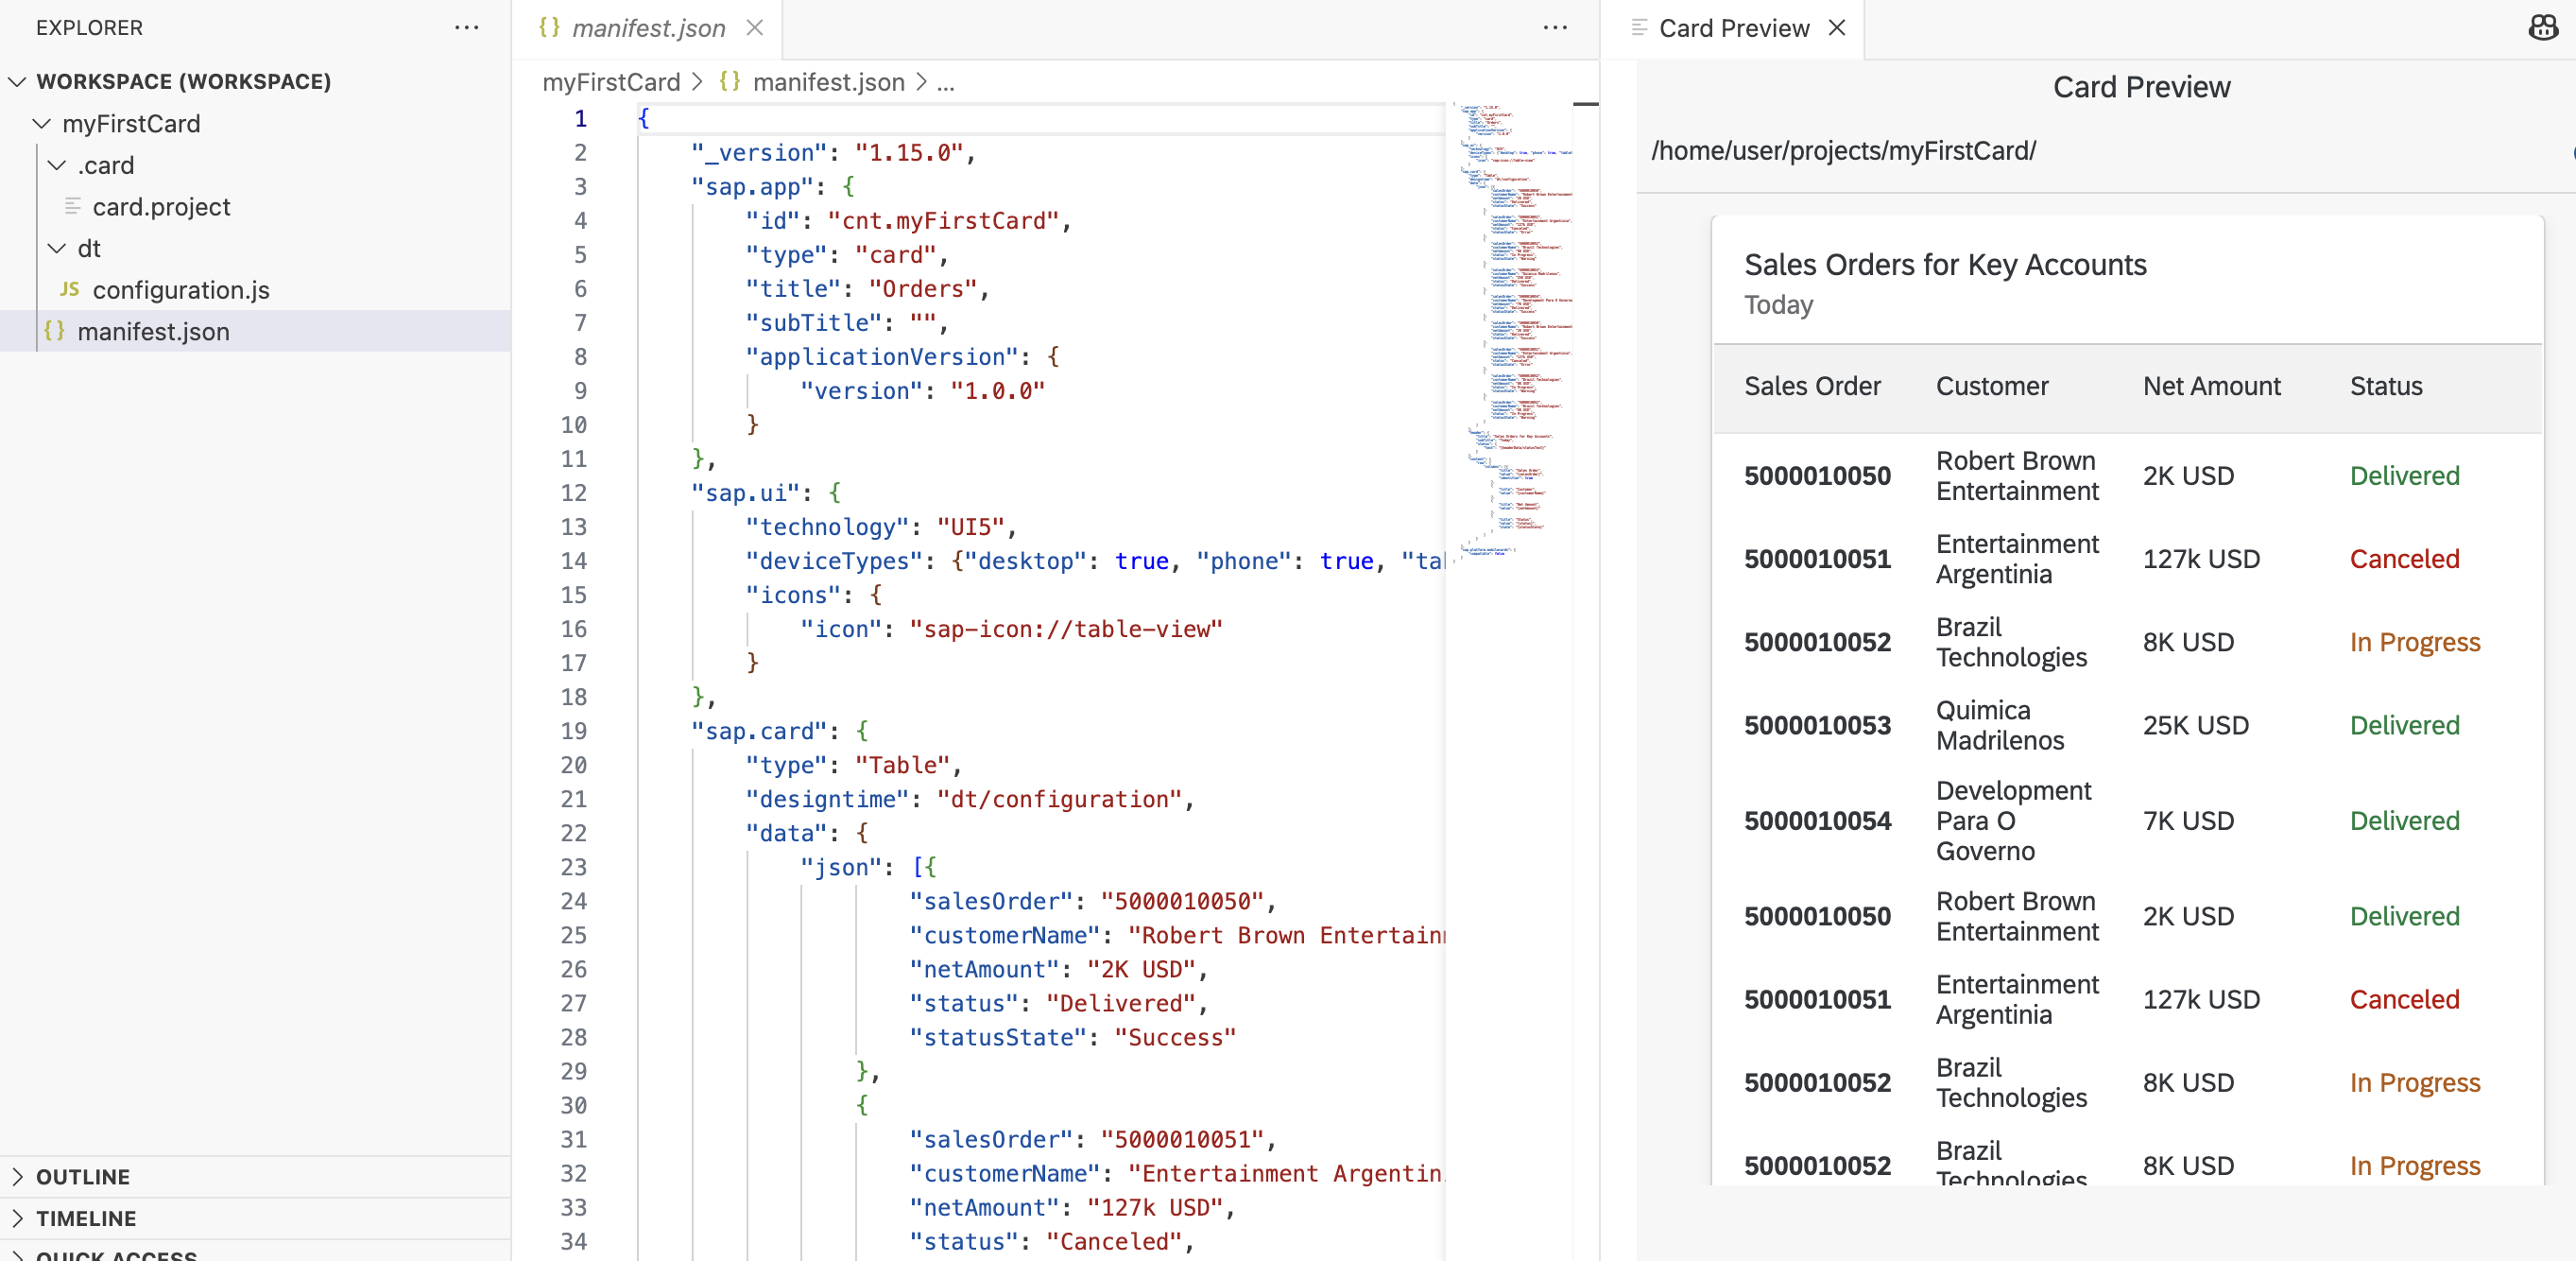
They are mainly defined through a manifest.json and can consume data from APIs, OData services, JSON, etc.
So far, nothing too mind-blowing… but here’s the interesting part.
I was expecting something tedious, a lot of code, endless UI tweaks… you know, the usual when you’re not into frontend. But no, creating a card is surprisingly easy
Honestly, in a very short time you can have something functional that already looks quite professional.
Let’s dive into cards configuration
- Create a new project from template and select UI Integration Card
- You just need to inform the title, the type of the card…
- And the card will be automatically generated, you will have your card preview with mocked data.
OData Service
Now let’s see what we can do with this, first I would like to connect this card with an OData (for sure this is something that we would do on each cards, otherwise it won’t make sense at all to have it 😂).
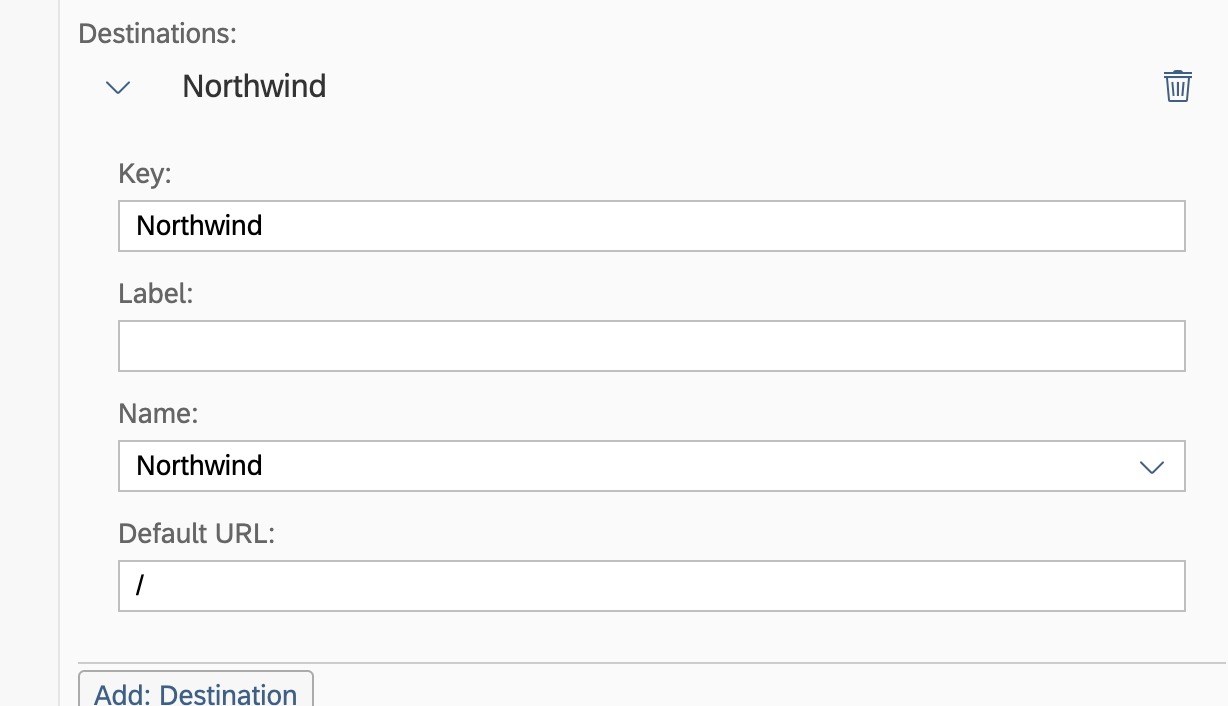
- Create destination at subaccount level (I’m using Northwind: https://services.odata.org/V2/Northwind/Northwind.svc/)
- If it’s not opened, right click on manifes.json>UI Integration Card: Edit option
- Click on add destination
-
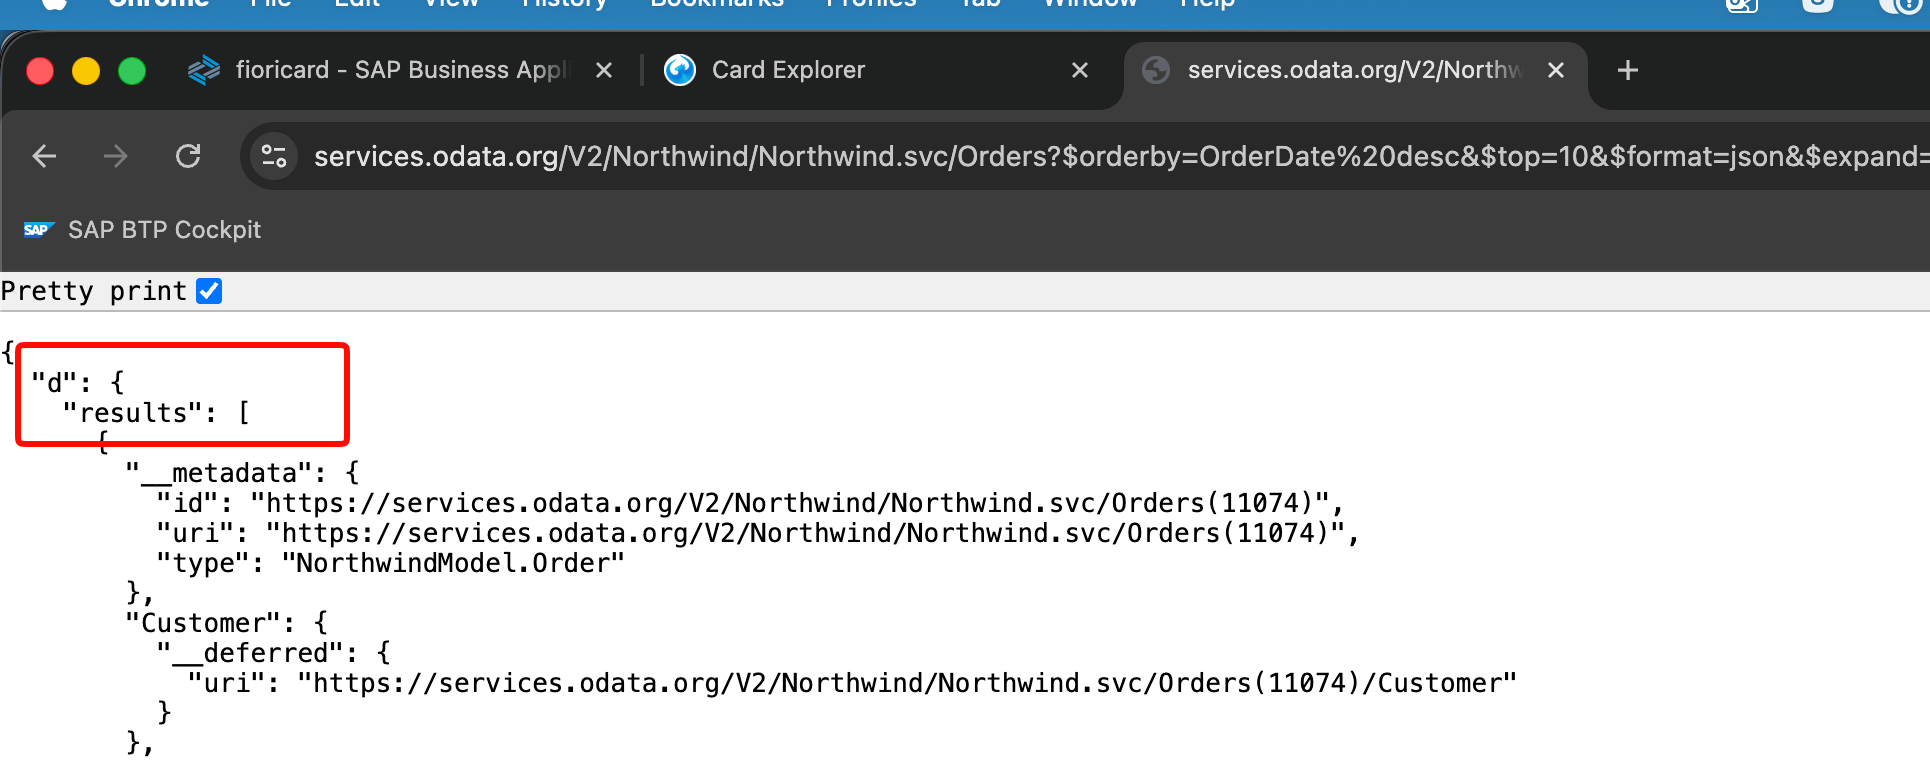
In Data Configuration (Card) I will add the following
/Orders?$orderby=OrderDate%20desc&$top=10&$expand=Order_Details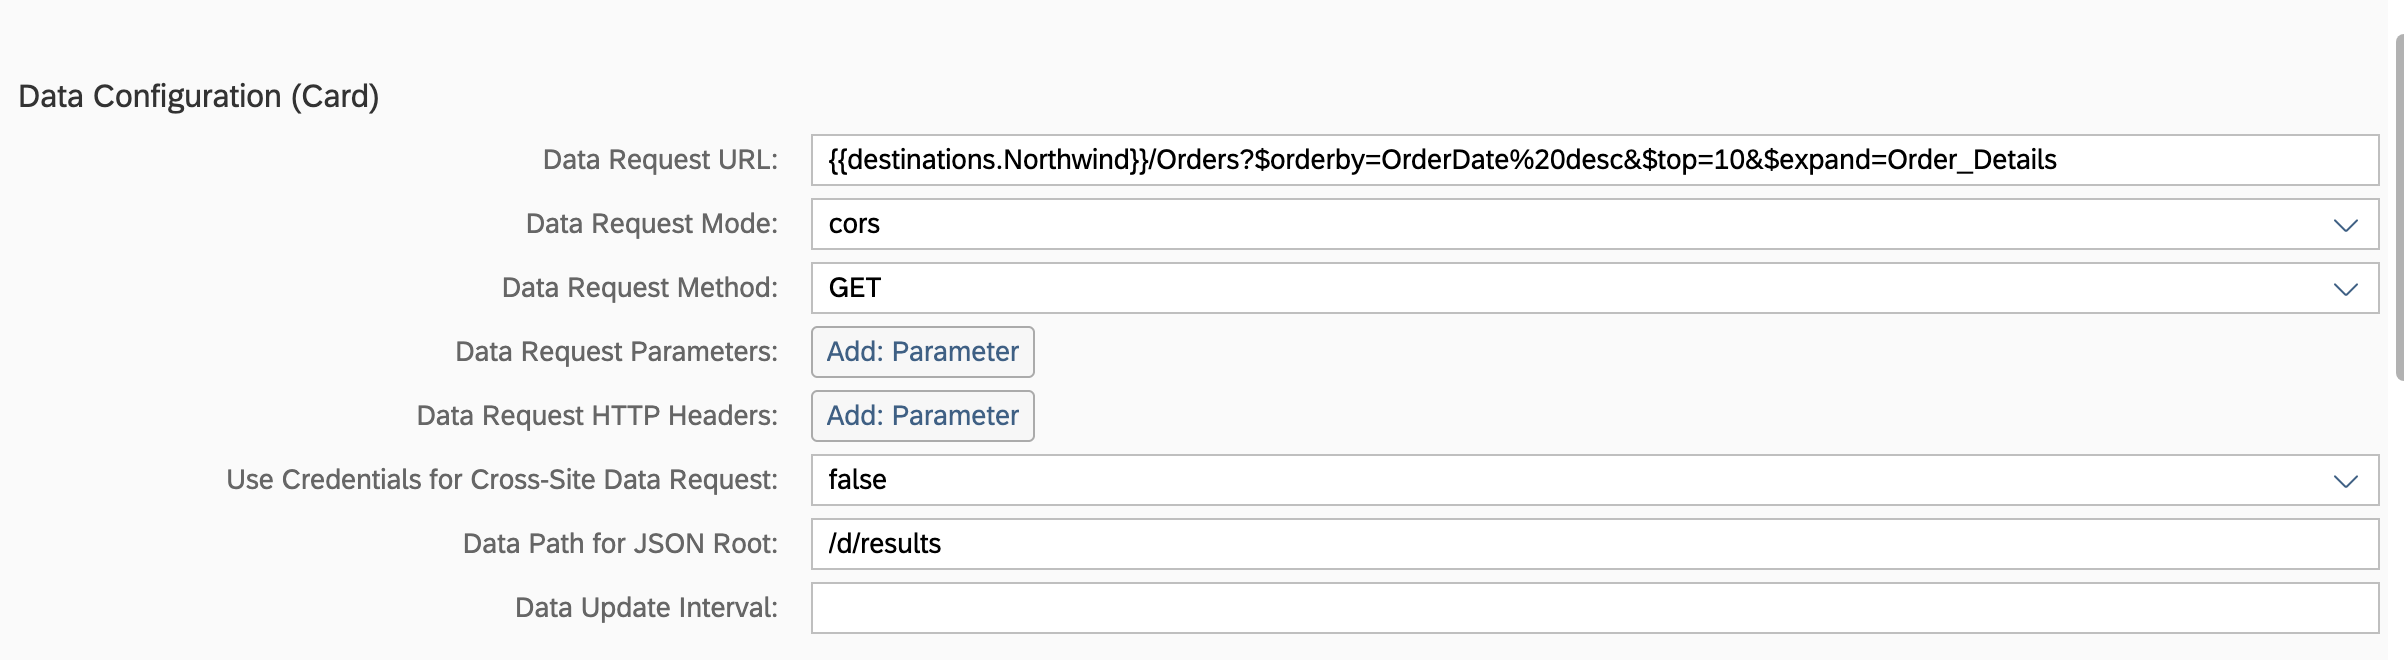
-
What is important here is of course the URL but also Data Path for JSON Root
-
Then you just need to configure the column by adding Value
{OrderUD}for example. You can also access to expanded attributes with{Order_Details/results/0/UnitPrice} -
Let’s put a little bit of formatting, for example add in Item Highlight
{= ${Order_Details/results/0/UnitPrice} < 30 ? 'Success': 'Warning'}
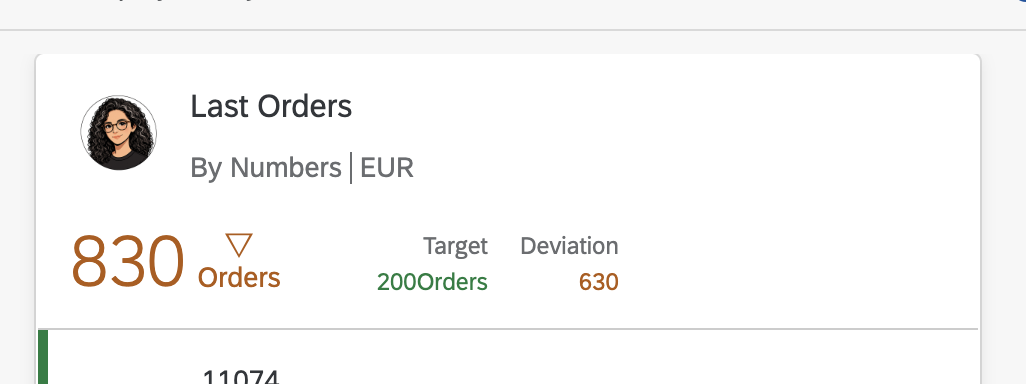
Header
There are 2 types of header
- Default header
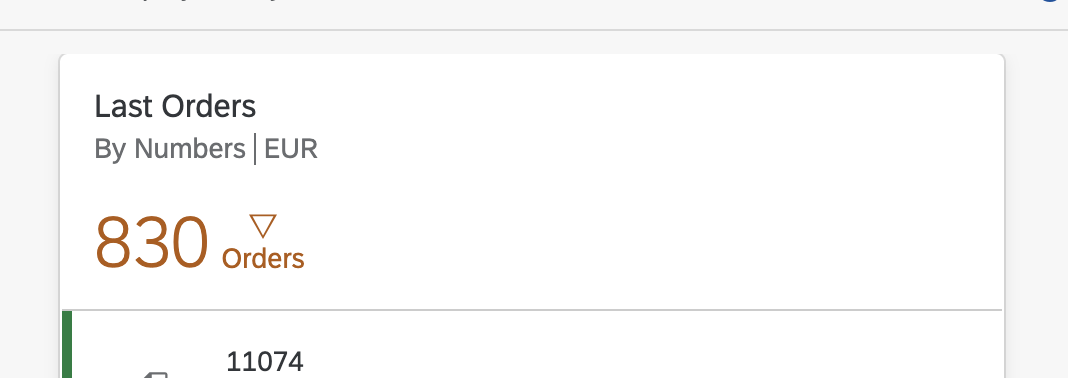
- Numeric header, numeric header allows you to add numeric information in the header (like a KPI)
So let’s configure a KPI for the header, you just need to go to Data Configuration (Header) and add there the request URL: /Orders/$count
In Card Header Configuration let’s add the following:
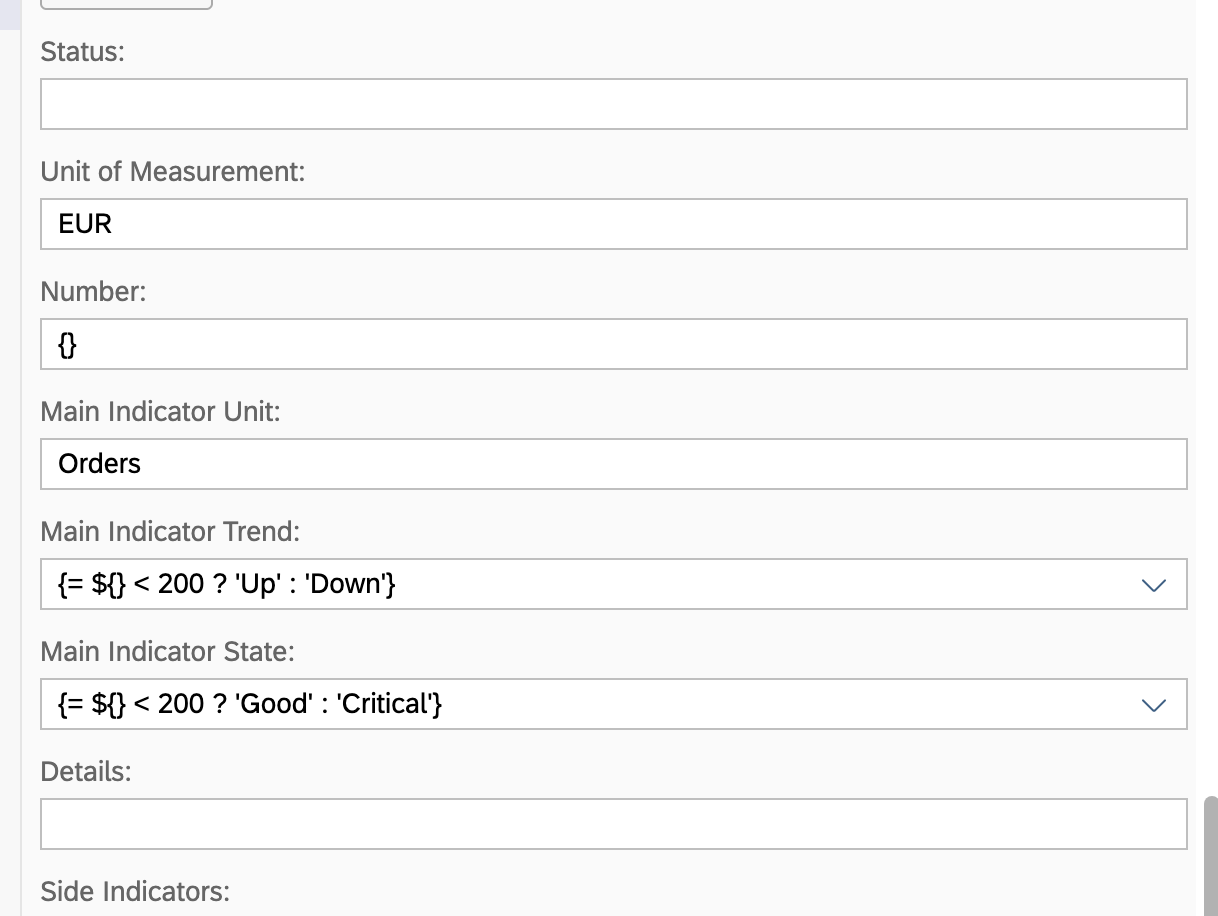
Now let’s play a little bit more and add a side indicator in the header.
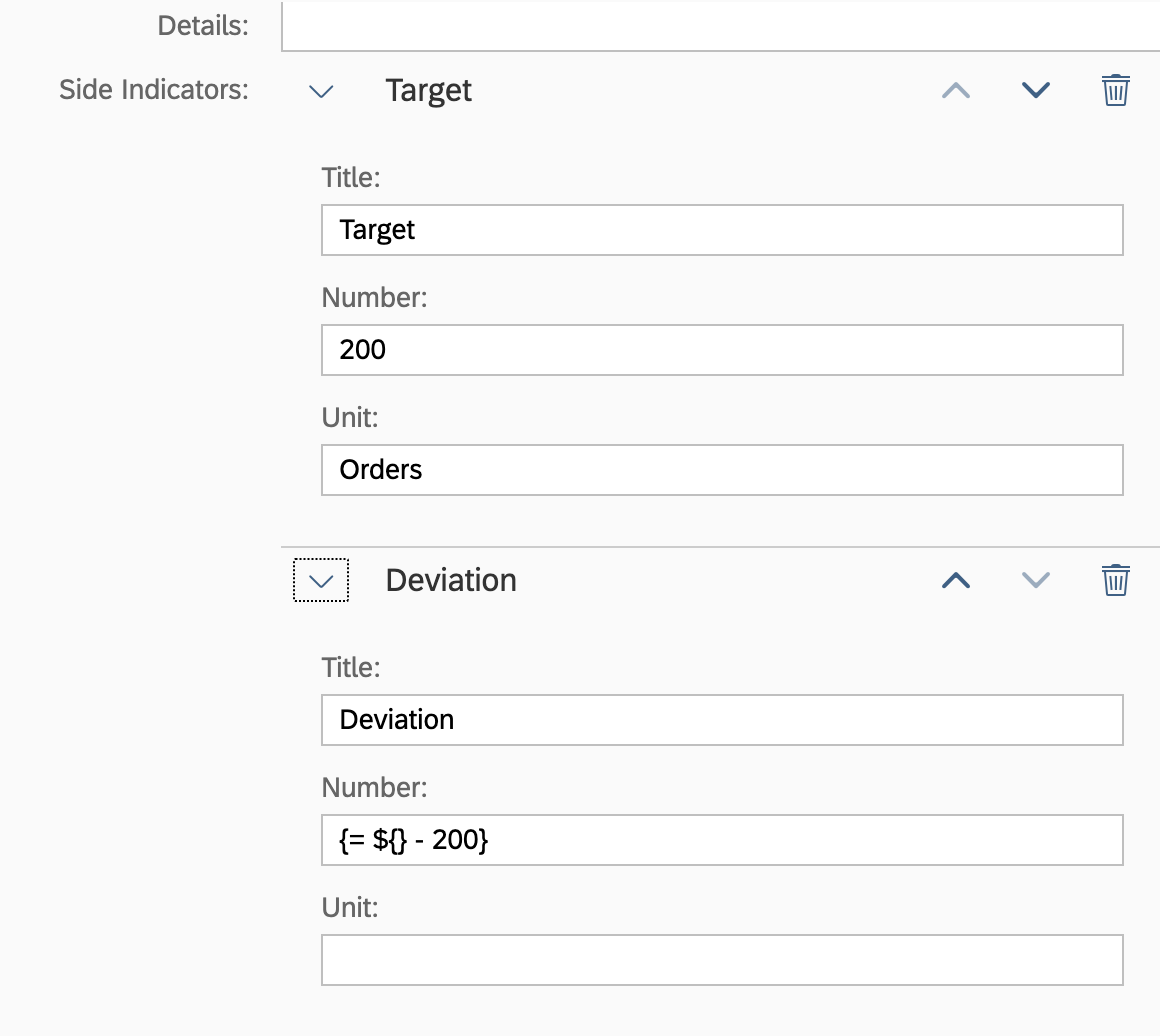
States should be added by hand since the editor doesn’t allow it:
{
  "sideIndicators": [
    {
      "title": "Target",
      "number": 200,
      "state": "Good",
      "unit": "Orders"
    },
    {
      "title": "Deviation",
      "number": "{= ${} - 200}",
      "state": "{= ${} < 200 ? 'Good' : 'Critical'}"
    }
  ]
}
Let’s go further and add an image in the header, you just need to:
- Create a new forder called
imagesand add there the image you want to load - In the
manifest.jsonadd the following:
{
  "icon": {
    "src": "./images/avatar.jpg"
  }
}
And voilá
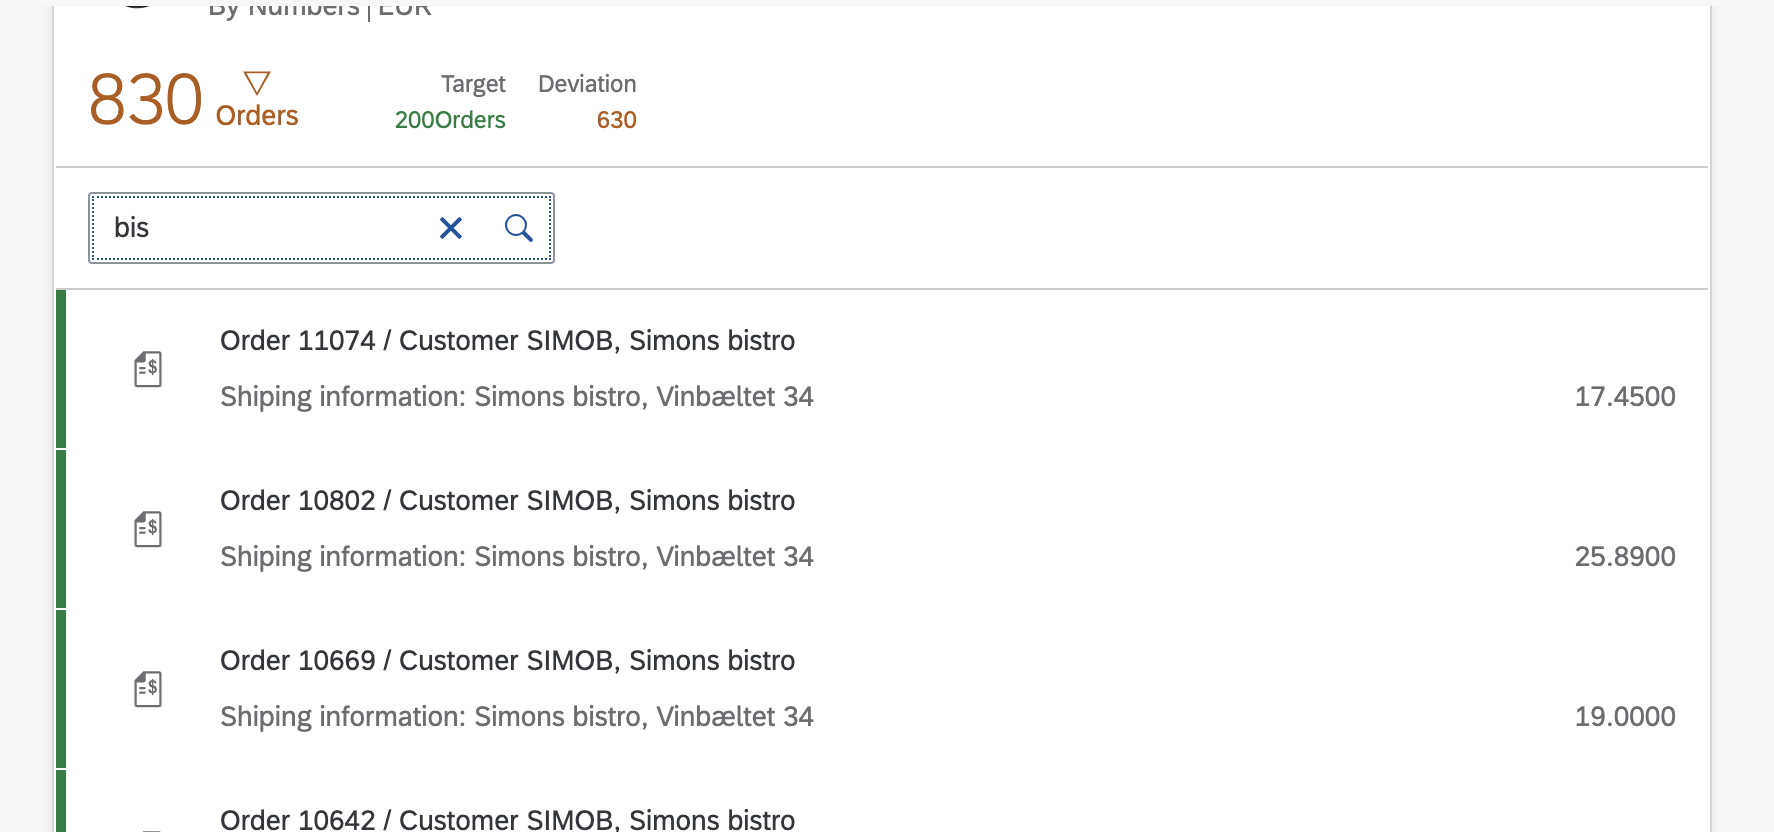
Filtering
Search
Let’s add some search in the header so we can look for some orders.
- In General Configuration>Add: Filter and add
searchShipand typeSearch - After that you would need to indicate the filter you would use, under Data Configuration (Card)>Data Request Paramters just add the filter key
$filterand valuesubstringof('{filters>/searchShip/value}', ShipName) eq trueand that’s all you can select in your list by ShipName
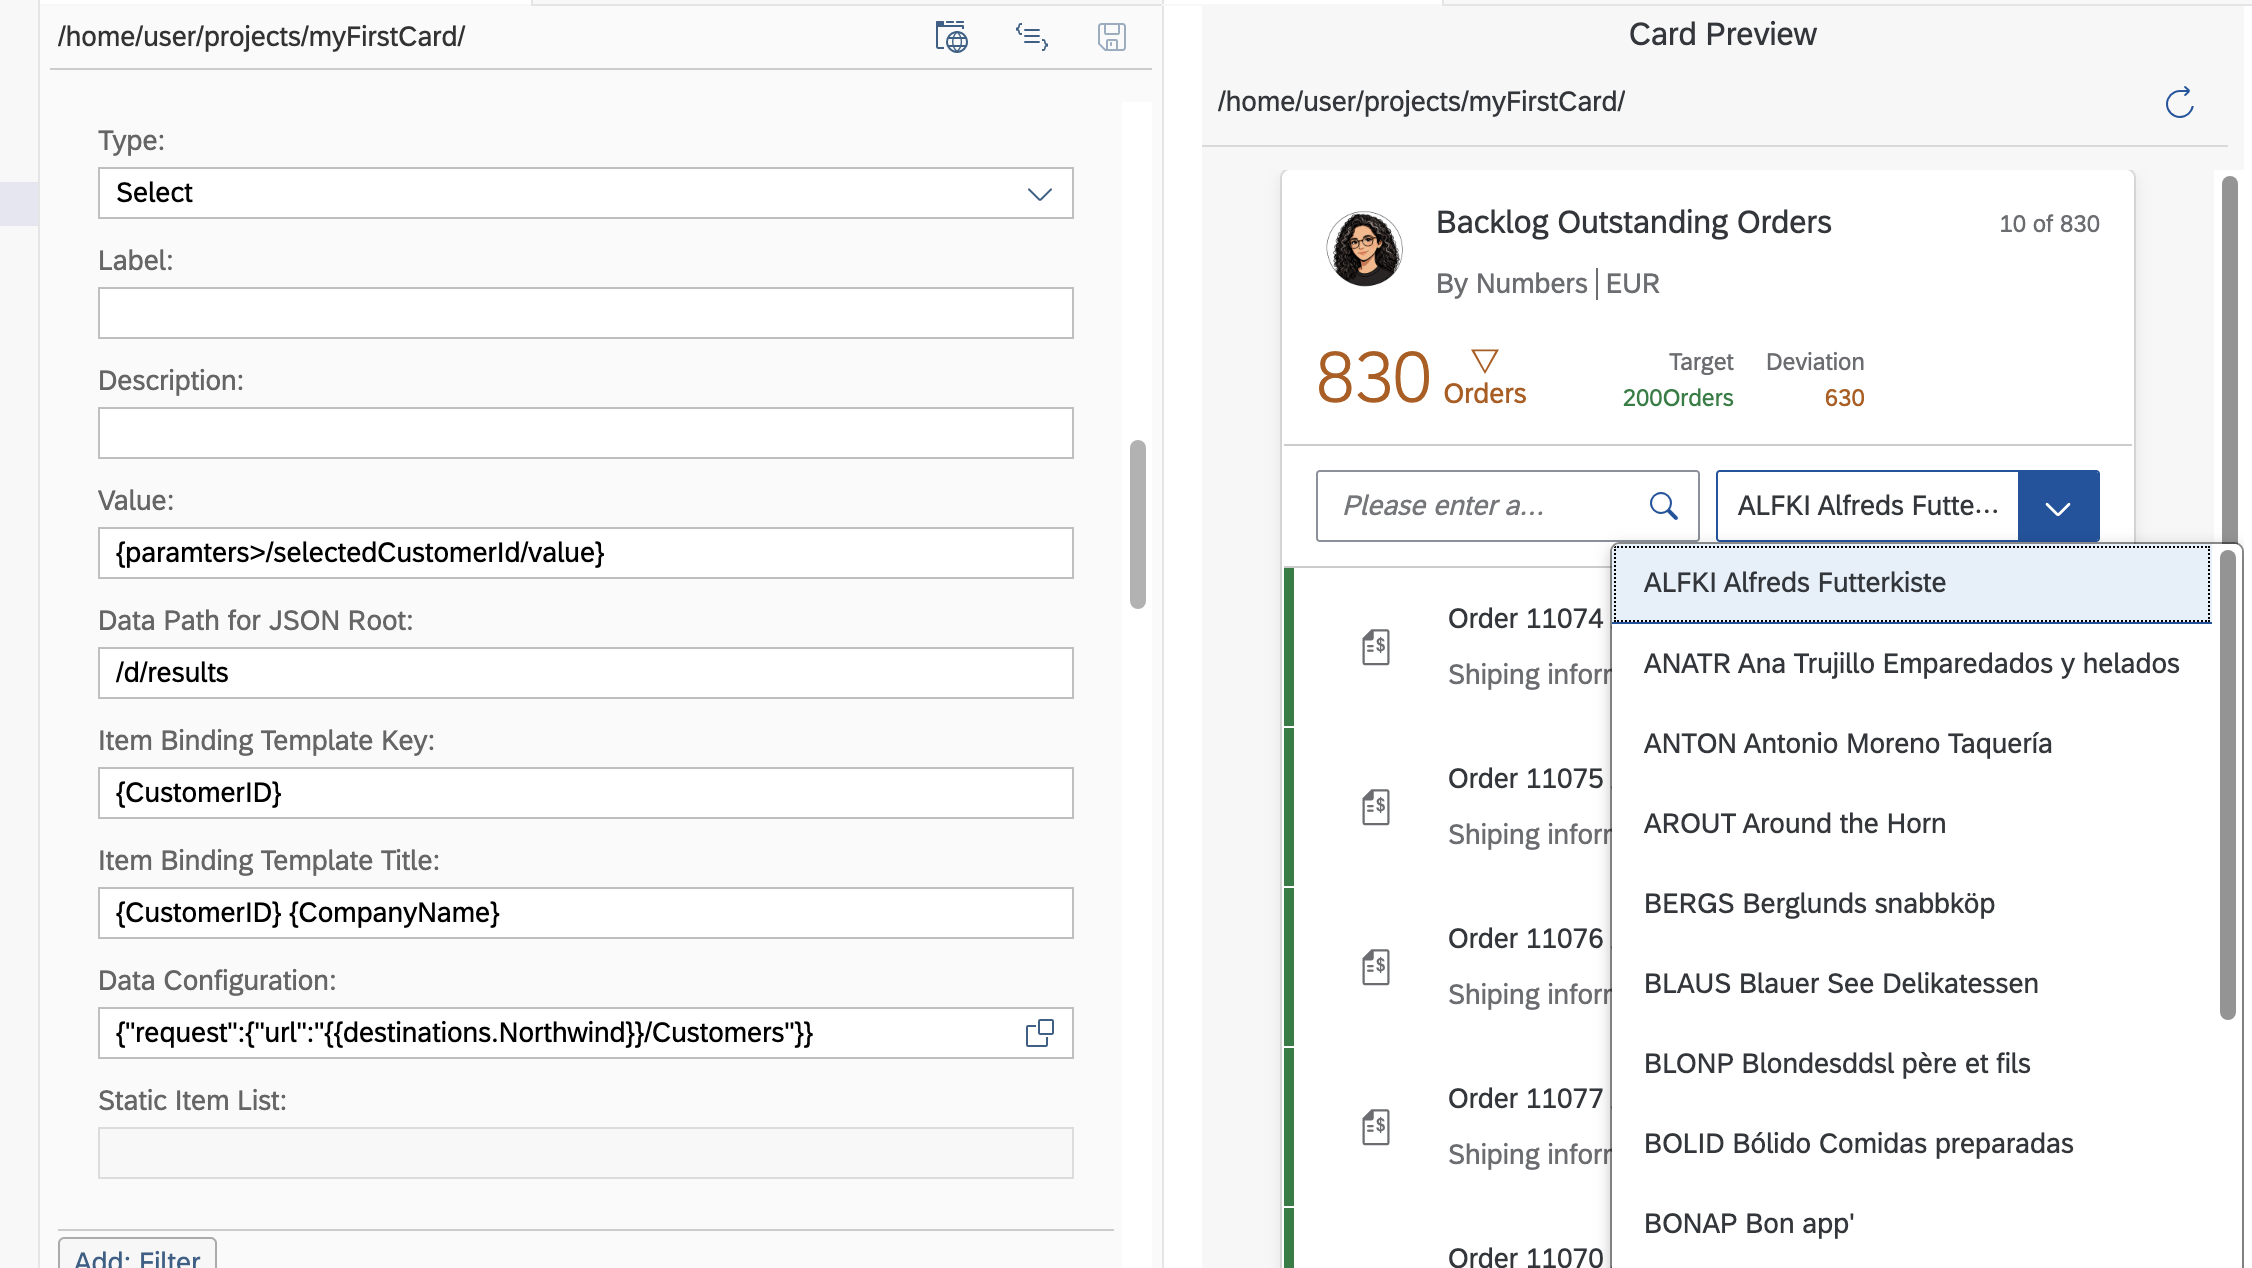
Select
- In General Configuration>Add: Filter and add
selectCustomerand typeSelect - In this case we will define a paramater to store the selected customer, for that let’s go to General Configuration>Add Parameter
key=selectedCustomerId - Once parameter is defined let’s go back to
selectCustomerand add invaluefield{paramters>/selectedCustomerId/value} - Go to Filters>selectCustomer>Data Configuration and add this to indicate the path of the request:
{ "request": { "url": "/Customers" } }
- As always in Data Path for JSON Root put
/d/resultsas it’s how data is coming - Next we should indicate the template for the item
- Item Binding Template key
CustomerID - Item Binding Template Title
{CustomerID} {CompanyName}
- Item Binding Template key
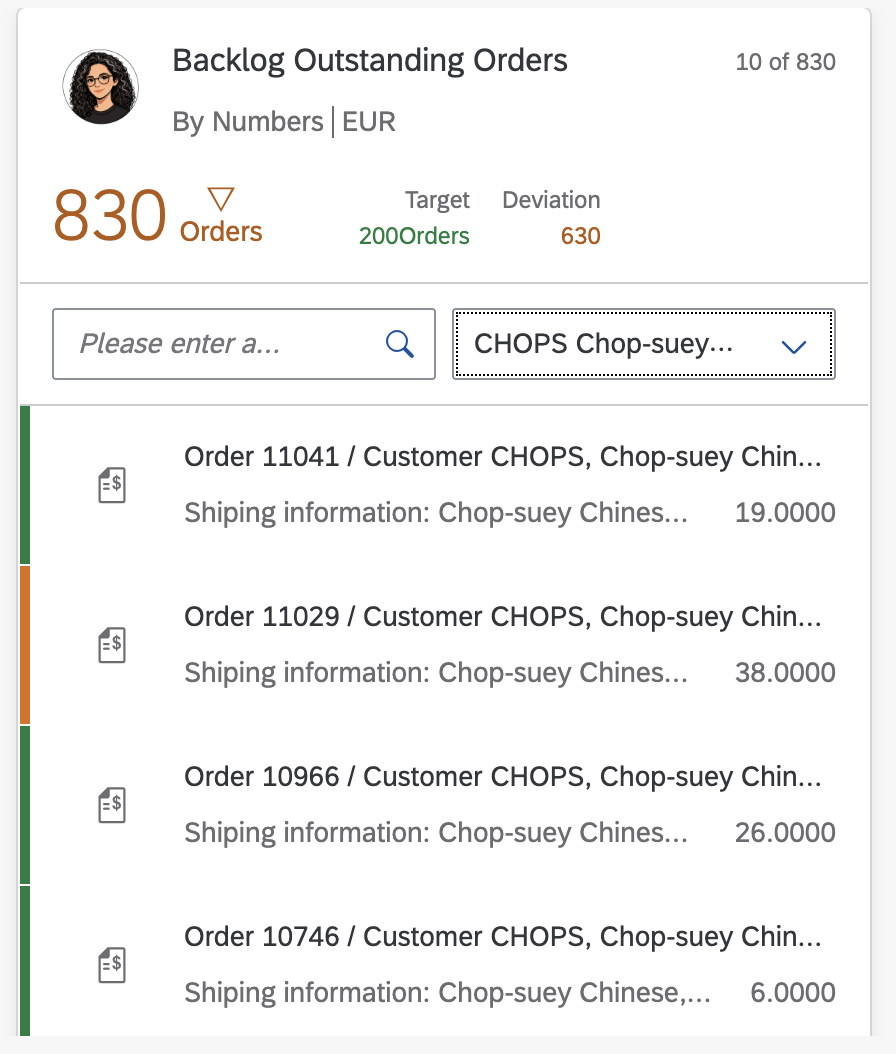
- Now let’s add the filter into the request everytime the user change the selection
- Change the filter key
$filterand add the new value into the request, it should looks likesubstringof('{filters>/searchShip/value}', ShipName) eq true and CustomerID eq '{filters>/selectCustomer/value}'
Deployment
Now let’s talk about deployment into SAP Work Zone Standard Ed. That under my point of view is the most tricky one to configure.
- Create a project from template > Content Package
- If you right click > into new generated
content.jsonfile and click on Content Package: Content Edit you will be able to add artifacts, but under my point of view this editor has a lot of gaps so it’s better to have a template and copy/paste as of now. - Create under root folder /code/src folders and there you should do two things:
- Create the
role.jsonfile where you will define which card is associated to which role
{ "_version": "3.2.0", "identification": { "id": "cnt.senior_reviewer.sm", "title": "Senior Reviewer", "entityType": "role" }, "payload": { "apps": [ { "id": "cnt.TableCard.app" } ] } }- Copy/Paste the
manifest.jsonyou have generated to create the card into src/code folder
- Create the
- Change
content.jsonfile to add a reference to the role and card artifact:{ "senior_reviewer": { "type": "role", "src": { "from": "./code/src", "content": "role.json" } }, "myFirstCard": { "type": "card", "src": { "from": "./code/src", "path": "./", "build": "", "package": "", "manifest": "src/manifest.json" } } } - Right click on root
manifest.jsonand Content Package > Package, it will generate a package.zip file ready to be imported into SAP Work Zone, make sure you have an ID with less than 20 character and title informed, otherwise SAP Workzone will trigger an error.
SAP Work Zone
- Go to Content Channels and click New > Content Package
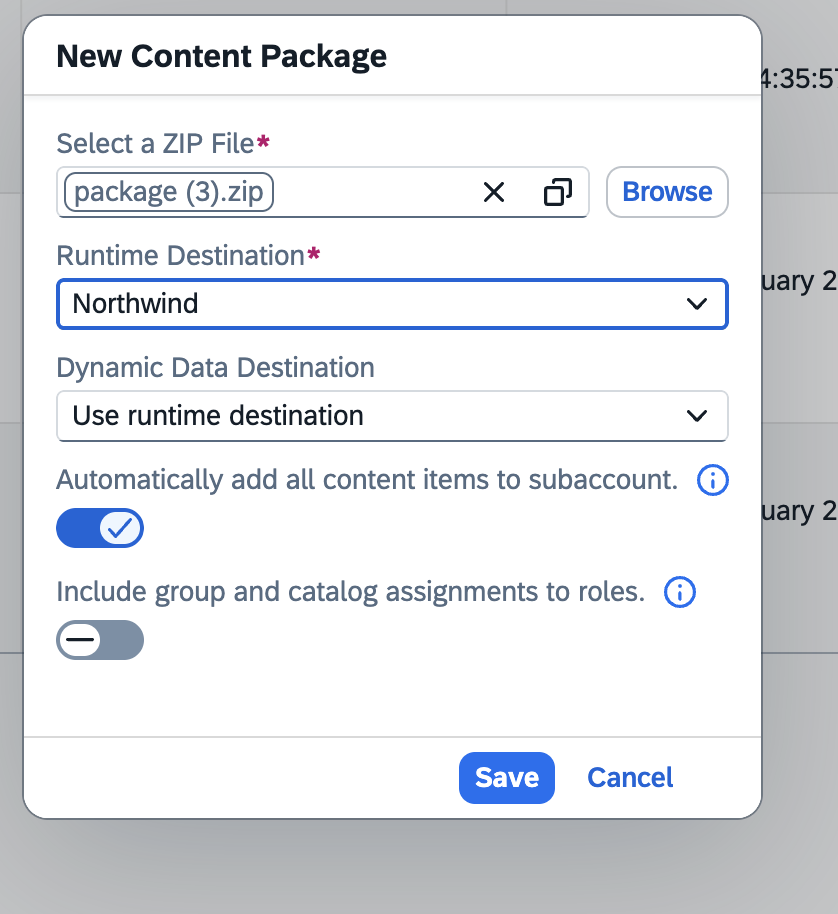
- Once it’s created we will be able to see the new role under Content Manager with the app already assigned
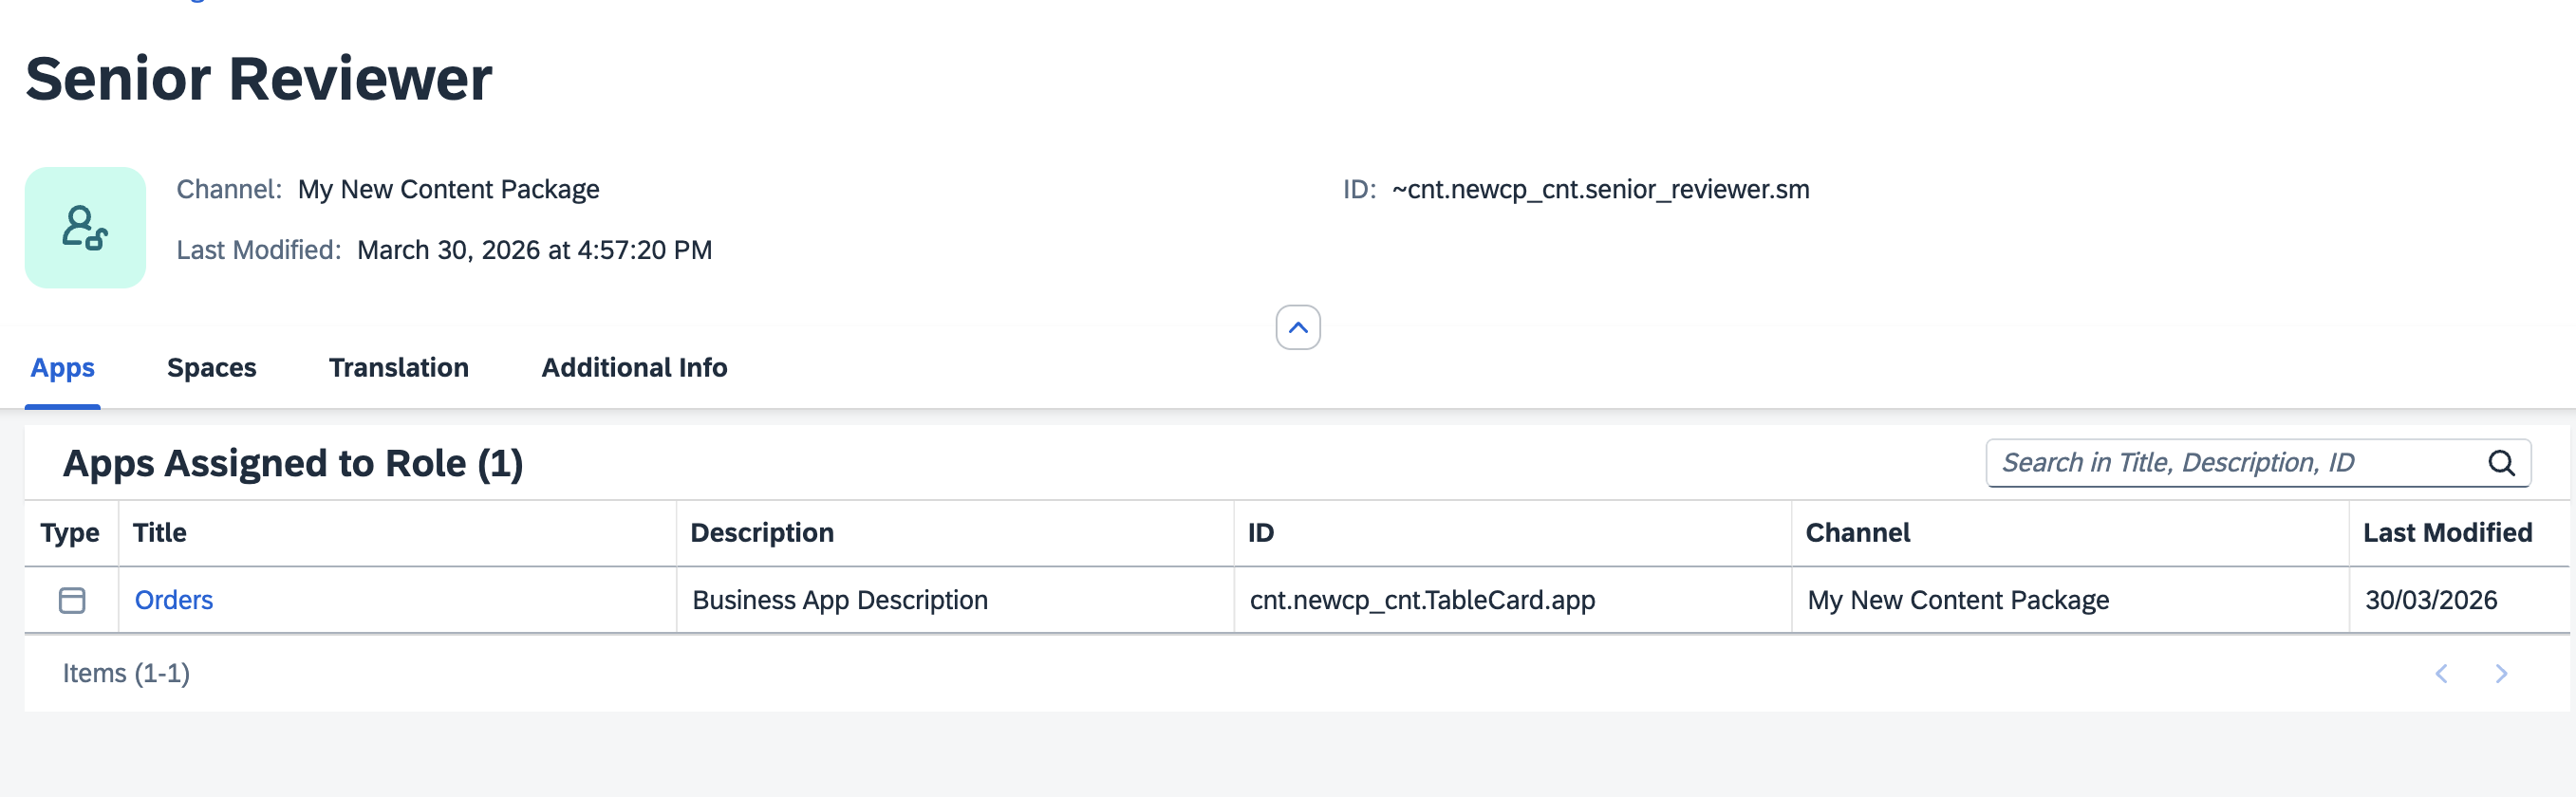
You just need follow now the procedure to assign proper Space & Pages to that role and assign it to Business User so he will be able to see the card.
🧠 Final thoughts
I’m not saying I’ve become a frontend person now 😅 But I can definitely say that UI5 Integration Cards are a powerful and very accessible tool.
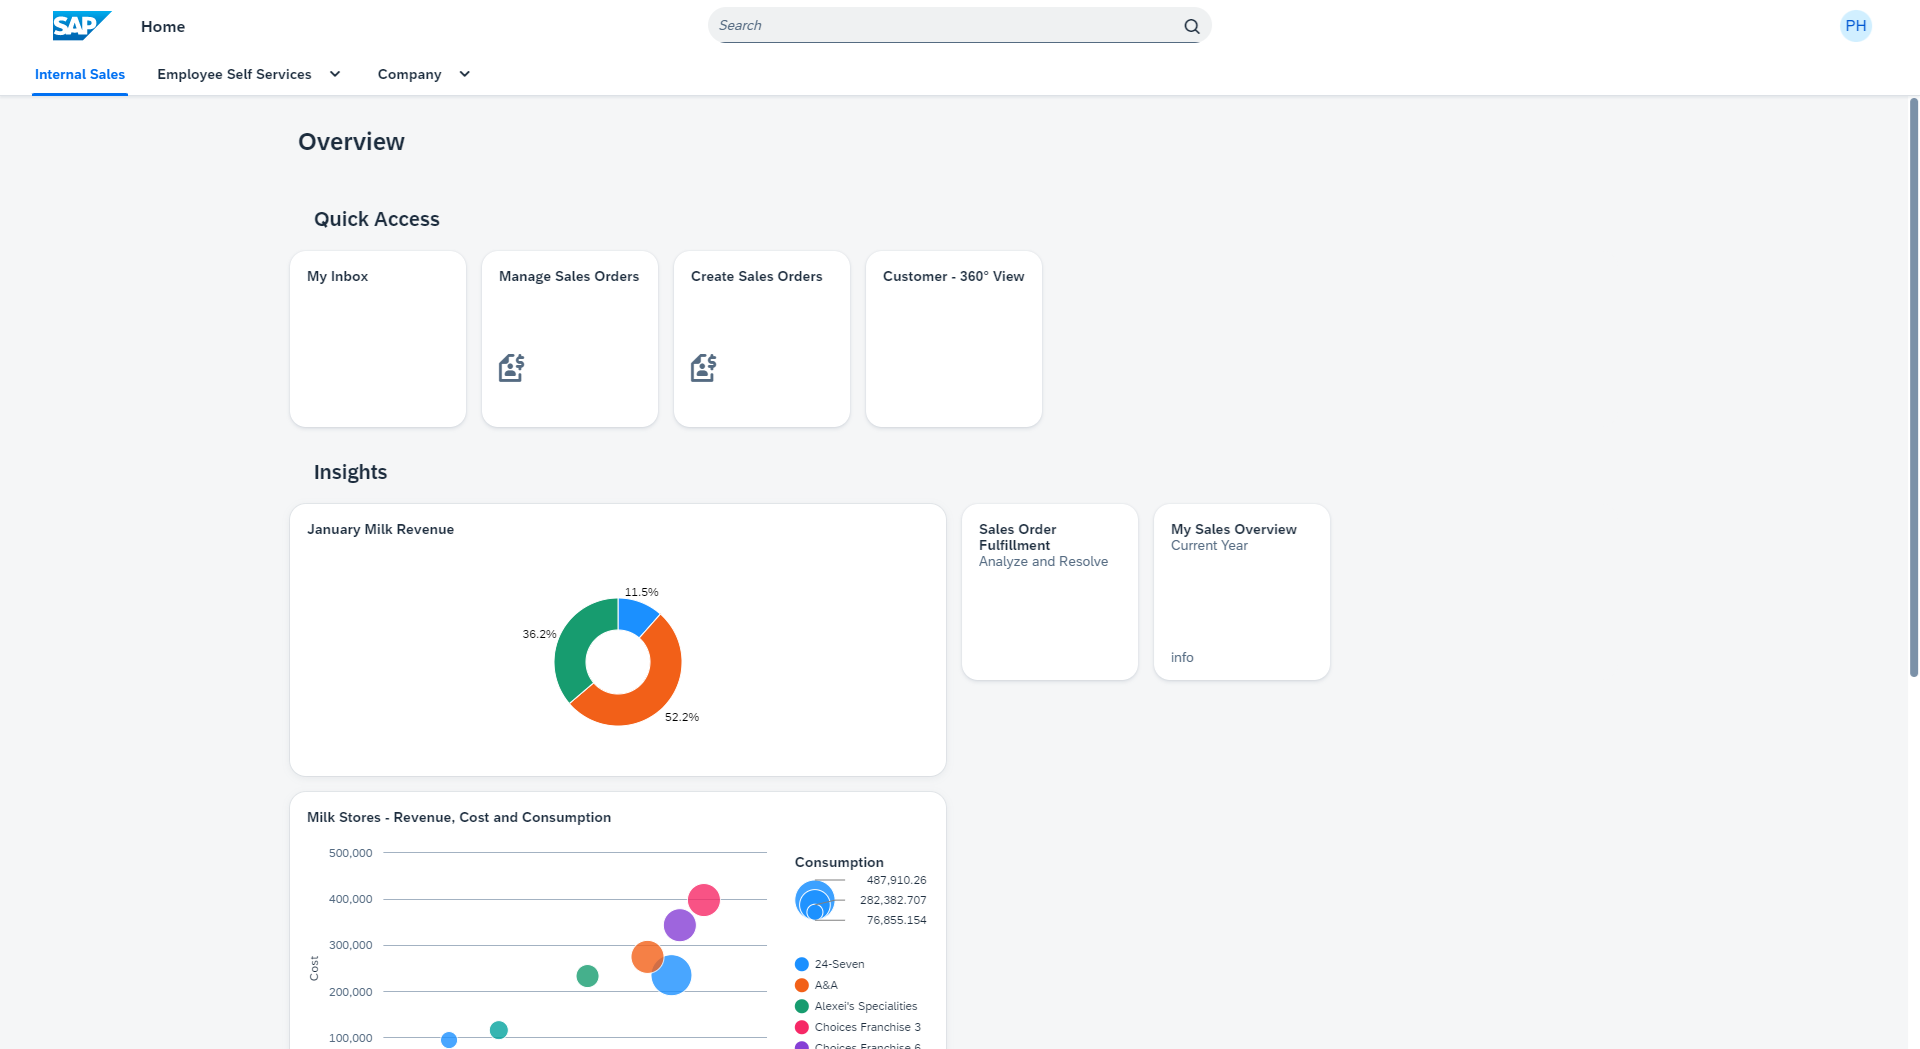
And most importantly: 👉 with very little effort, you can build something that looks really good in SAP Work Zone
In practice, SAP Business Application Studio tends to be required. While many developers (myself included) are more comfortable working in VS Code, the reality is that when you work with UI5 Integration Cards, you rely on Business Application Studio.
Deploying Content is too manual under my perspective editor is not so good and could be confusing. There is an option to deploy the content directly into SAP Build Work Zone from Business Application Studio but I was looking for it and I couldn’t find any documentation… if you have some info please let me know !
Refer this for more information
Comments